Search This Blog

Tuesday, November 29, 2011

Salt Dough Ornaments..... Getting Crafty !!!!

Salt Dough Ornaments

Here is the recipe we used:


  • 4 cups all-purpose flour
  • 1 cup salt
  • 1 1/2 cups warm water
  • mix flour and salt and add water slowly as you stir....once mixed, knead the dough with your hands until soft and pliable...roll out the dough....cut with cookie cutters...use a toothpick to make a hole in each one for hanging
  • place on a cookie sheet and bake at 325 about 1 hour.
Pictures coming soon !!!!


Saw this online, and thought I'd share it as well 

Saturday, November 19, 2011

Tu Tu cute .... hand made tutu so simple to make...


to make a child's (or adults) tutu is VERY simple....
its a NO sew project so if you can use a pair of scissors then you can make a tu tu too...

materials needed....

Thule or crinoline material
scissors
elastic
decorative ribbons ....

1) Start out by measuring you child's waist
2.) cut length of elastic should be about 2 inches wider than child's waist
3.)then cut your Thule the double the length you would like the tutu to be each piece should be about 5 inches wide
4.)then fold your cut lengths in half and do a lark shed knot (see drawing) the lark shed knot looks cleaner and you get a nice uniformed look when finished
5.) continue doing the lark knots all around waist band then tie a knot in the elastic when you have finished
6.) add a decorative bow over top of elastic knot.. and your all done !!!!

this project should take under 30 mins to do
and shouldn't cost more than $15 dollars to make it :)


I used 6m of fabric to do both tutu's shown.. these are VERY fluffy you could use less but 3m is a good amount for a basic tutu :)


you can make little "tutu " hair clips too.. just attach the thule to the hair clip or around a hair elastic.. the possibilities are endless :)

Thursday, November 17, 2011

More Spin Art !!!!!!


Ok.. So Lately mrK (3years old) has been wanting to do nothing but spin art.. he loves squeezing the paint out of bottles and watching the paper wildly spin around in the salad spinner... Instant gratification for him... and I love it too.. so pretty and easy for him.. I love how excited he gets...

So Today was a snow day.. We received about a foot of snow last night so we decided to stay at home and have an inside say...

So I made up a few "snow man" shapes and then let my son coat them with shades of blues and silvers in the salad spinner....

He thought we needed 4 snow men (there are 4 in our family so that makes perfect seance :) ) I used a heavy card stock ,and drew out some hats , mitts, branches for arms, and carrot noses using markers then cut out each shape.. my son suggested using rhinestones for buttons... and I drew on the "coal" for the mouths with a black sharpie .. and Of course Googly eyes were used for eyes... Any chance mrK gets to use googly eyes he will .. :)

After the spinning part of the snow men was dry.. (paint dried in about 45mins) we used a mix of white glue and some water and I let mrk Glue down the parts where he liked.. he did remarkably well.. faces were where faces should be.. hats on head.. mitts on arms.. and buttons down the front...

I think he did a wonderful job !!!! I love watching him show everyone his art when they come into the room :)


Supplies Needed for this Project........
1.) salad spinner
2.) heavy paper or card stock
3.) scissors
4.) Glue
5.) markers
6.) googly eyes
7.) ribbon to string snow men together


you could also make your snow men accessories out of Felt or other cloth if you like

Glitter could be added for an extra sparkly snow man...

Wednesday, November 16, 2011

A Hand Made Kinda Christmas .....


So this year my goal is to make alot of the presents I give...
I was given a huge box of fabrics, alot were less than 1/2 a meter of fabric so I had to be creative and crafty :)


So the 1st thing I started making was snow flakes, these have been hung in the play room from the ceiling.. and they have stared in the kitchen covering the windows and I hope to make some more for the play room windows too.. the thing I really love about snow flakes is you can put them up in November and keep them up till Mid March...


We decided wit write a little Letter to Santa.. and Since I love to scrap book I got out some of my supplies.. since my son is only 3 we went through the Sears wish book and he picked out some toys and put the pictures on his list.. then I helped him write the letter.. he was very sweet about asking for some things for his sister who is only 1 and cant really talk yet .....


Next I made two "Elf on the Shelf" .. These little guys are Santa's biggest Helpers I named them Merry for the Boy and Noel for the Girl... My son thought we needed two Elf's one to watch him and one to watch his sister... When we go to mail the "dear Santa" Letter.. Merry and Noel will be "mailed" along with the letters.. and if they have been extra good Merry and Noel will return with Santa and all the presents :) (I wont actaull mail Merry and Noel, and I'm sending a photo copy of the kids letter to the "actual" Santa... I want to keep all their dear Santa Letters for when they are older.. : )


As I said I was given a box of random fabrics this year and I have 27 kids on my list so I wanted to make something they could use and would enjoy so I made up 27 little kids Aprons, great for Play, Crafting , and helping cook or bake in the real kitchen ..... They were Very simple to make.. I traced out a "apron" shape onto some newsprint the cut out all 27 aprons.. then used Extra wide bias tape to finnish the edges.. then I used Random ribbons that I had in my collection for the neck and waist ties...
Then because I love my own kids just a little bit more, on their aprons Ive Added a large pocket and their names onto the pocket with fabric...I used the "button hole " feature on my machine to finish the edges around each letter and the Heart and Star... I think they turned out really well... Bright and fun.. and something that will last for years...

Friday, November 11, 2011

Holiday Crafts to do with your kids....


So the Festive season is upon us.. and a friend asked me for some easy -ish craft ideas that she could do with her son.. and as I started to e-mail her I realized.. I should stick this on my blog :)

So here are a few simple crafting idea's to do with your kids ...

1.) Cut out felt in the shape of Christmas trees. or snow flakes . then mount it to stiff paper or an old card.. then let your child drizzle glue all over the tree then put some glitter into a shaker and then shake glitter all over the tree knock off the excess... then cut out the tree... you can make your tree any size, smaller ones can go inside a Christmas card.. frame larger ones as gifts...

2.)hand print Christmas trees.. get a small is.. 8x10 canvas from the dollar store or Micheals .. and paint your childs hands (palm) green then print them.. three across along the bottom.. then two on top and then a third on top to make a TREE shape ..fingers down ward to be the "branches" or leaves" then print a star on the top.. and a brown stem.. and your done.. so simple

3.) last year I printed the kids hands about 30 times (green paint on palm) on a nice thicker paper i think we used scrap book paper.. and then cut out each hand print.. then arranged them in a circle to make a hand print wreath ...then using their thumbs printed red "berries" and put those all over the wreath. hand print red and green wrapping paper... palms painted red or green and then hand stamp the paper .. gives it a home made look :) and everyone loves this stuff ..

4.) Mr.K also really liked making bracelets for my sister this year... she loves them.. I bought some nice glass beads and other assorted beads.. nice ones not cheap plastic ones .. and then let him string them on a wire... then I finished the ends with nice clasps.. easy to do with a pair of needle nose pliers... then I took pictures of him making them and sent the picture along with the bracelet...

5.)Mr.K Loved to make the jar candle votive.. you simply rip up some tissue paper, then coat the out side of a jar or a glass with white glue slightly watered down... then stick the tissue up all over the jar.. then coat it with your glue again.. let it dry and pop in a tea light.. mrK also liked sticking stickers to the jar..then tie a festive bow around the tip or bottom and your done.. they turned out well and he loved doing them.. I've got a huge costco sized pickle jar that is going to get this treatment done to it.. and I have a couple packs of battery powered Christmas lights that are going to go inside.. i think it will be a nice easy addition to our holiday decor :)


6.) snow flakes... I've googled snow flake templates and have found 100's of them.. my kids play room is now decorated in snow flakes :)

7.) honey comb (cereal) snow flakes.... get out your glue and a box of honey comb cereal and glue together to make unique snow flake shapes.. then spray paint or hand paint them white or blue and then cover with glitter ... hand with fishing line and marvel at your creativeness....

8.) Count down to Santa... make a Santa head. .then add a long oval sheet of paper for his beard.. mark it with the count down of 24 (start at the bottom 24 and work way up to 1) then as you do your count down you snip off Santa's beard... So cute and simple

9.) apple candles .. using an apple corer cut out the shape of a tea light, then inset your tea light and enjoy super simple and looks so festive...


Wednesday, November 2, 2011

Halloween Candy Wreath....


So I'm taking my own advice.. I made a candy Wreath today.. :)

so simple to make...

Step 1..
Cut a circle out of cardboard , I used a dinner plate , traced it, the used a smaller plate traced it on the inside of the big circle..
so I ended up with a "doughnut"

step 2.....
Cover cardboard in what ever you like.. ribbon paint tissue paper fabric.. what ever you have handy...
I used 1/2 inch orange satin ribbon

step 3...
lay out your candies

step 4..
hot glue down the candies...


I accented mine with an orange ribbon and some wired glitter ribbon...

and its now in the Halloween decor box for next year :)

the whole project took me less than 15 mins to make :)

Leftover Halloween Candy Idea's....


So this year we have more left over Candy than a family of 4 really needs.. Especially since our kids are 1 and 3...

So I've come up with some "purposing idea's... and how to "spread it out" so you dont end up chucking it...

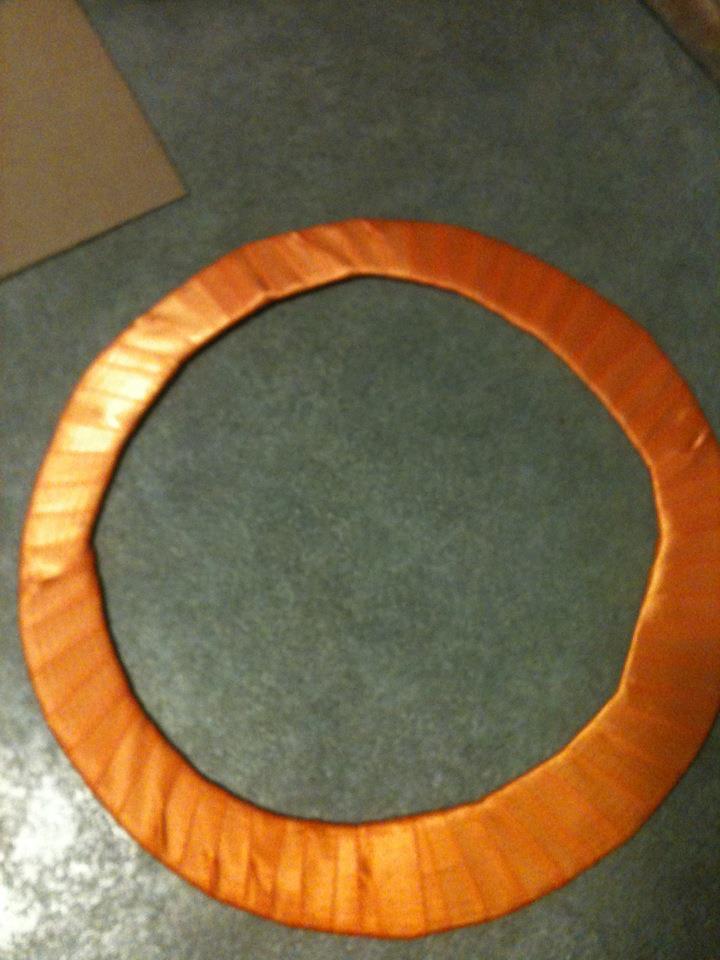
1.) make a candy wreath for next year... you can use a foam wreath or make one out of cardboard, then hot glue the candies onto the wreath add some glitter and ribbons.. and Tah dah... candy wreath all ready for next year ...

2.) Baking .... almost all chocolates can me mixed into your baking... google is my best friend when it comes to making any recipe... the simplest idea is make a batch if chocolate chip cookies.. then substitute mini chocolate bar chunks and you have an assortment of yummy treats...

3.) freeze mini chocolate bars, then thaw them out and use them as garnishes on cold days when hot chocolate is in demand ... or add them to "magic " coffee's
toss an Areo or any chocolate candy bar into a hot chocolate... nom nom nom.. I did that tonight :)


4.) devolve in liqueur .. chrispy crunch vodka is amazing :)

5.)Donate it... Doctors offices , old folkes homes , women's shelters, and the food bank .. everyone loves candy so share share share :)

6.) keep it for a holiday pinata .... Most Halloween candy is good for at least 6months-1 year check the expiry dates... Freeze it if you can :)

7.) bring it to work.. put it into a bowl in the lunch room.. make a "enjoy" sign.. it will be gone in no time ..

8.) keep a stash in your car.. who knows when your GPS will take you to the middle of no wear and you might have to live off of it...

9.) Bribes.... yes I said it.. Bribe candy is amazing :)

10.) put it out in a festive bowl at Christmas time no one will know its from Halloween.. and it will still be good.. test out a few just to be sure... and make sure that no "Halloween" candies make it too the bowl :)


Be creative .... :)

here's some recipes I found on the web....

Aero Squares

If you love Aero chocolate bars...you’ll love these even more!

  • 2 cups graham wafer crumbs

  • 2 cups coconut

  • 1/2 cup melted butter

  • 1 can sweetened condensed milk

  • 4 Aero chocolate bars

  • 1/4 cup butter (second amount)

  • Stir together graham wafer crumbs, coconut, melted butter and condensed milk. Press into an 8“ x 8” pan. Melt 4 Aero bars with 1/4 cup butter. Pour over top of mixture in pan. Refrigerate. Cut into squares.

~~~~~~~~~~~~~~~~~~~~~~~~~~~~~~~~~~~~~~~~~~~~~~~~~~~

Mocha Angel Dessert

This is an easy and delicious fancy coffee flavored dessert. (In case you hadn't noticed, I am really fond of coffee!) Great for a party or potluck dinner.

Ingredients:

1 package butterscotch pudding mix (not instant)
1 1/2 cups water
1/2 teaspoon instant coffee powder
1/2 teaspoon vanilla
1 angel food cake
3 Coffee Crisp chocolate bars
2 1/2 cups whipping cream, whipped
1/4 cup coffee liqueur


Directions:

Mix pudding mix and water together in a medium saucepan. Cook and stir over medium heat until thickened. Remove from heat and stir in coffee powder and vanilla. Cool.

Cut angel food cake into 1 inch pieces.

Crush Coffee Crisp bars in food processor.

Fold half of the whipped cream into the cooled pudding, and stir in the liqueur. Fold in the angel food cake pieces.

Assemble in a nice glass dessert bowl. Start with a layer of 1/3 of the pudding mixture. Top with 1/3 of the crushed Coffee Crisp bars. Then another layer of pudding, another layer of Coffee Crisp, the remaining pudding, and the remaining Coffee Crisp. Top with the reserved whipped cream. Refrigerate for at least 3 hours before serving.

~~~~~~~~~~~~~~~~~~~~~~~~~~~~~~~~~~~~~~~~~~~~~~~~
Peanut butter cup Cheese cake,.....

Preheat oven to 325 degrees F.

Prepare a 8-inch square baking pan by lining the pan with aluminum foil, leaving 3-4 inches of foil draping over the sides of the pan.


The Crust:
Place 7 whole graham crackers, broken into 1-inch pieces, into the bowl of a food processor and pulse until the crackers form fine crumbs, about 30 seconds.
To the crumbs, add 6 tablespoons (3/4 stick) unsalted butter (melted and cooled), 3 tablespoons brown sugar, 2 tablespoons all-purpose flour, and 1/8 teaspoons salt. Pulse until the ingredients are fully combined. Using the bottom of a measuring cup or your fingers, press the crumbs into the bottom of the prepared pan.
Bake until the crust is beginning to brown, 12 to 15 minutes. Let the crust cool on a cooling rack for about 30 minutes.

The filling:
In a large bowl, beat 2 (8 ounces each) packages softened cream cheese until it is very smooth, about 3 minutes. Scrape the beaters and sides of bowl frequently.


Gradually beat in 2/3 cup granulated sugar until the mixture is combined, about 1 minute. Beat in 2 large eggs, one a time, making sure that each is fully incorporated. Beat in 1/4 cup sour cream and 1 teaspoon vanilla extract until fully combined, about 30 seconds.

Unwrap and cut 9 Reese’s peanut butter cups (0.75 ounce each) into 6 pieces. Gently fold into the cream cheese mixture.

Scrape the cream cheese mixture into the baking pan, over top of the cooled crust. Spread evenly.

Bake until the edges are set but the middle still jiggles slightly when the pan is shaken slightly, 35 to 40 minutes, rotating the pan halfway through baking.

Place the pan on a cooling rack and allow the bars to cool for 2 hours. Cover with aluminum foil and refrigerate for at least 3 hours, and up to 24 hours.

Using the overhanging foil, lift the bars from the pan. Gently remove the foil and cut into 16 bars.

Chop 2 oz. bittersweet chocolate and place in a small bowl. Microwave on 50% power until melted, stirring every 15 seconds. Drizzle the chocolate over the bars, top each with a small chunk of a Reese’s peanut butter cup and serve.

that one makes my mouth water just reading how to make it....